Thursday, June 12, 2025

Path of Exile 2: Dawn of the Hunt – Maw of the Verdant Tyrant


In Path of Exile 2: Dawn of the Hunt, the jungle shudders beneath the footsteps of a new apex predator—the Verdant Tyrant. Found deep within the primal biome of Virdal’s Maw, this massive boss encounter serves as both a mechanical and POE 2 Currency thematic climax of the Hunt league’s savage ecology. In this guide, we’ll explore how to access this deadly fight, the mechanics of the boss encounter, build considerations, and loot incentives that make facing the Verdant Tyrant worth the risk.


Unlocking the Maw of the Verdant Tyrant

To challenge the Verdant Tyrant, players must:


Complete all 8 Jungle Hunts across the Dawn of the Hunt campaign. These Hunts pit you against elite predator bosses that drop Hunter's Sigils.


Combine 3 Hunter's Sigils with a special map fragment—Fanged Totem of the Alpha—in your Huntwork Station.


This fusion creates a Virdal Offering, which can be used to open a Verdant Lair Portal at the Hunt Obelisk.


Note: You’ll need at least one character capable of handling Tier 10+ encounters before attempting the Maw.


Area Overview: Virdal’s Maw

Upon entering the instance, you’re dropped into a foggy, overgrown canyon filled with vines, poison spores, and residual blood from previous prey. There are no regular mobs—only a winding approach to the Tyrant’s den with scattered traps and growths that shoot spore mines.


Tips:


Movement skills like Flame Dash or Leap Slam help avoid environmental hazards.


Remove ailments quickly. Poison resistance and corruption immunity are vital here.


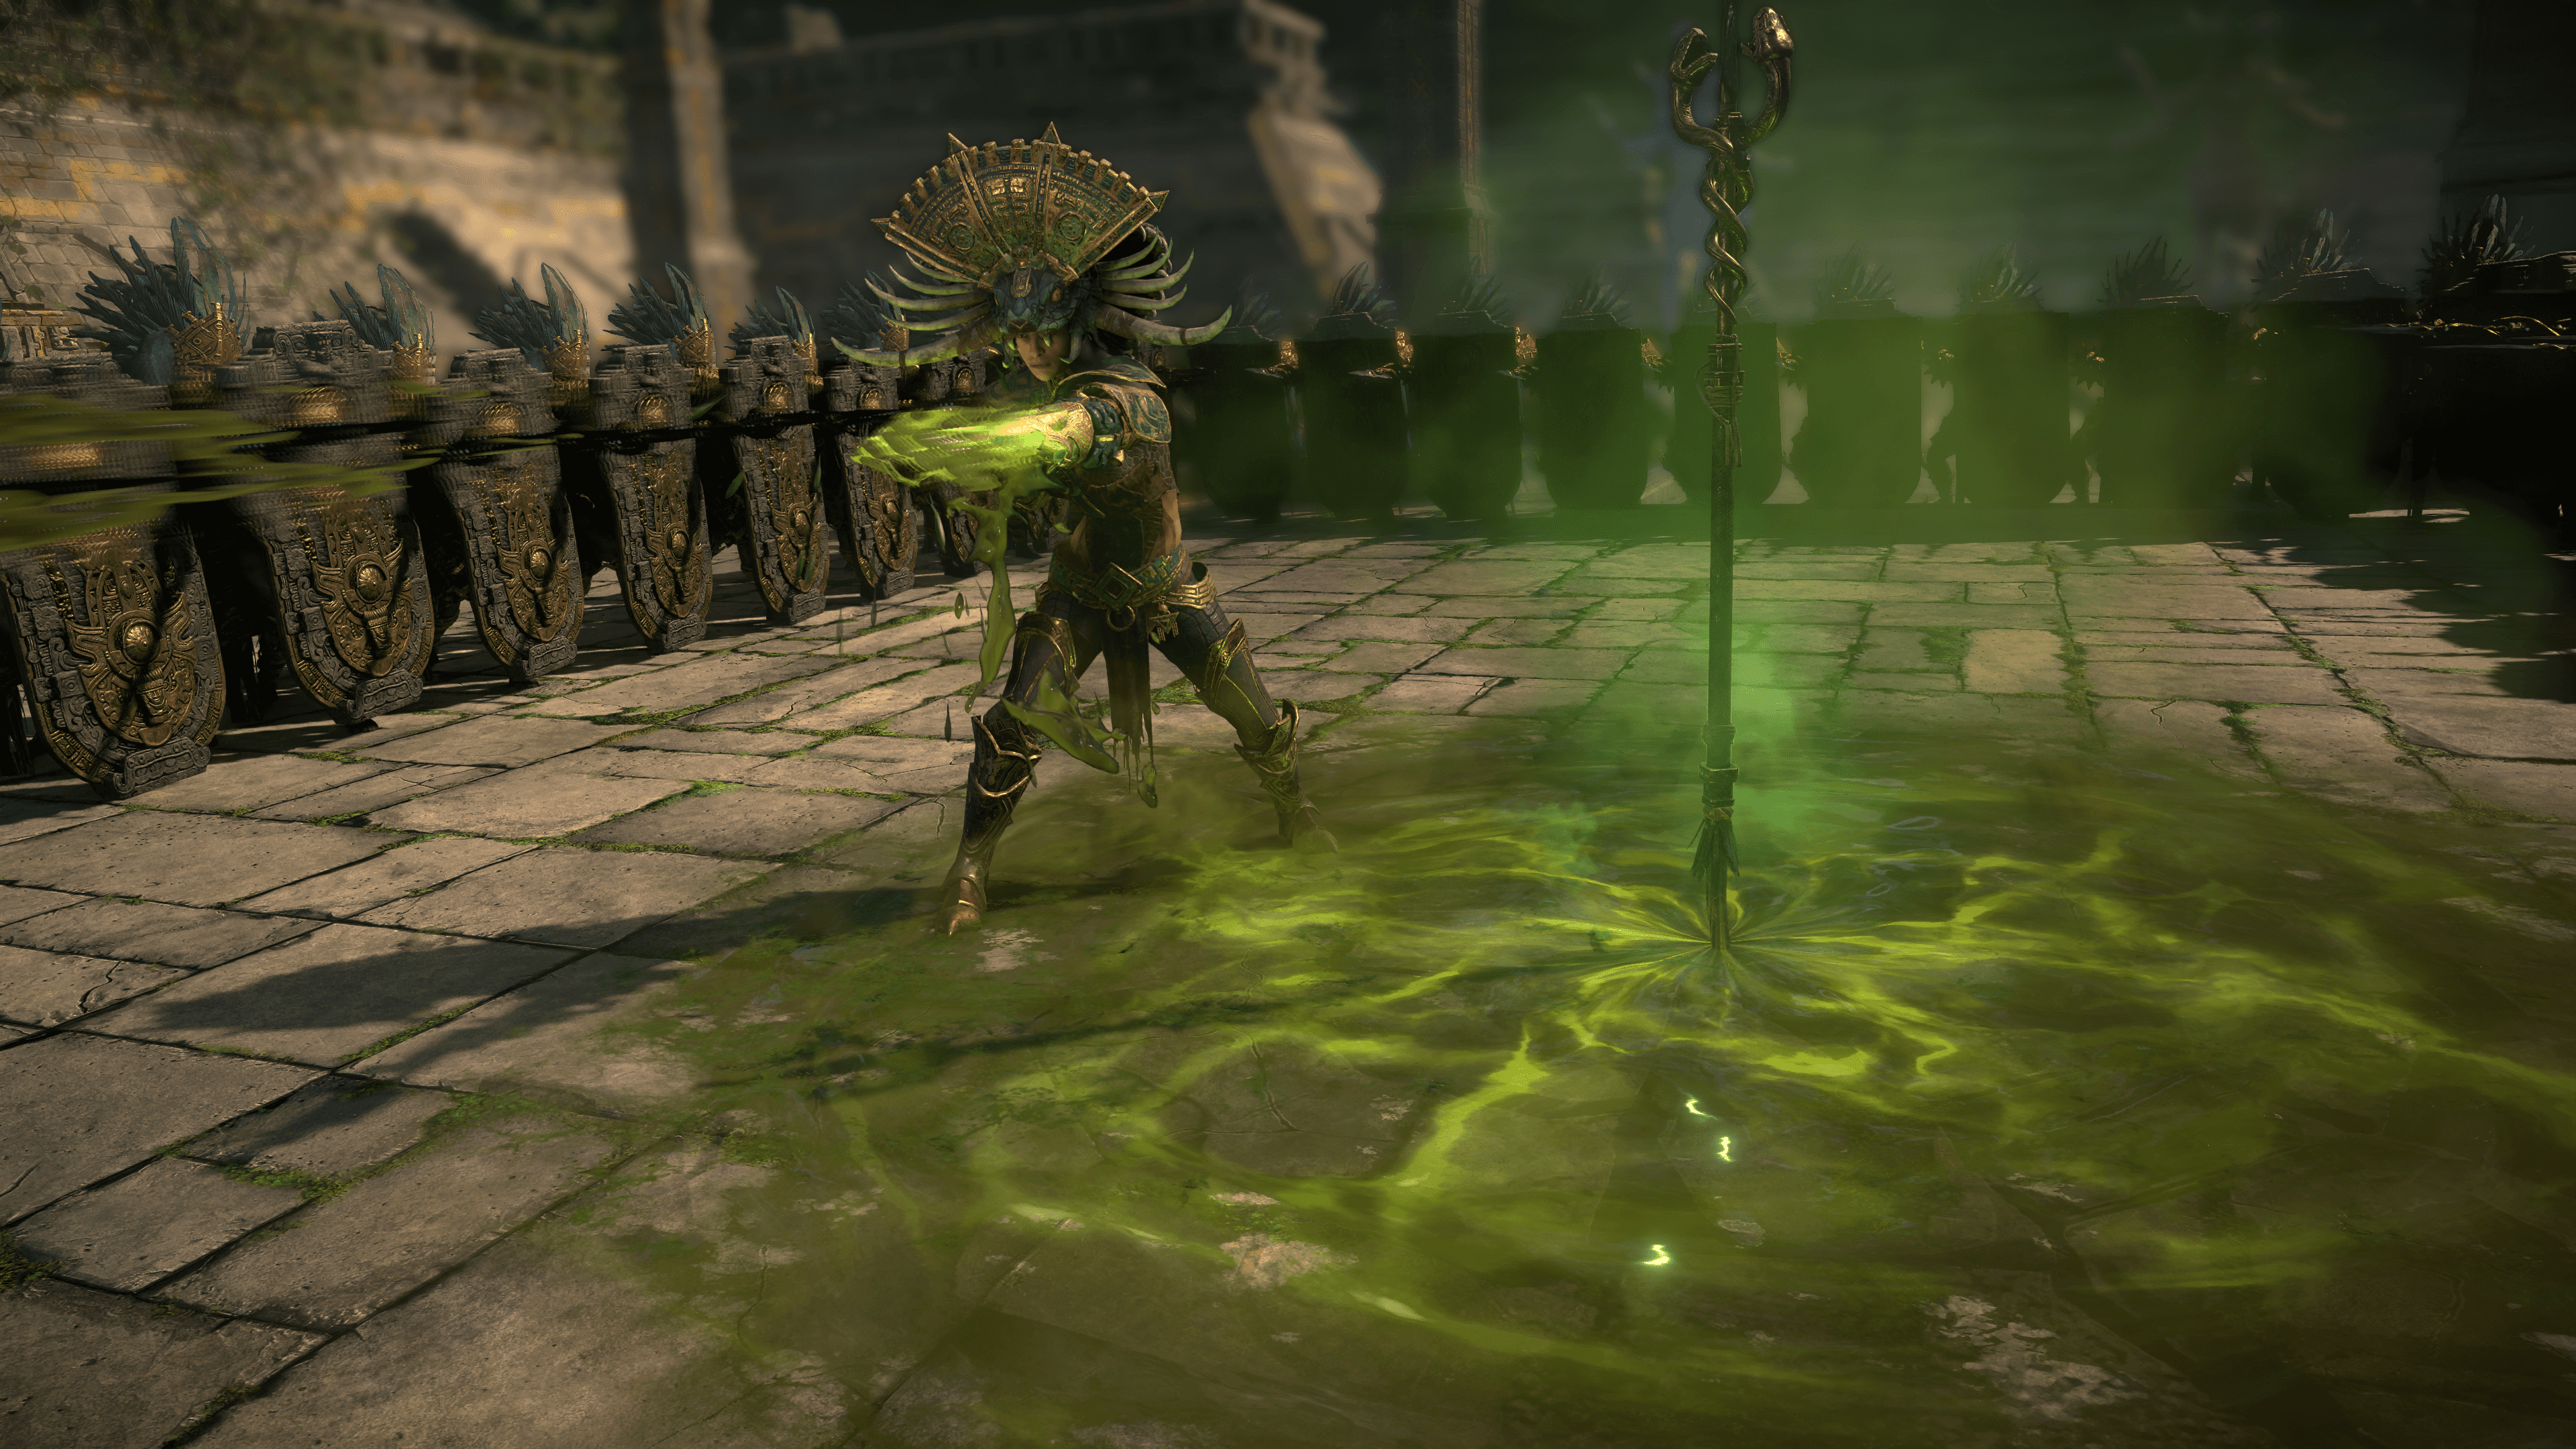
Boss Fight Mechanics: Verdant Tyrant

The Verdant Tyrant is a titanic plant-beast hybrid with multiple phases, each more dangerous than the last. The fight demands quick reflexes, positional awareness, and high DPS uptime.


Phase 1 – Territorial Onslaught

Root Slam: A slow wind-up slam dealing massive physical and poison damage in a cone. Sidestep this—never tank it.


Feral Charge: Locks onto the player’s location and barrels forward. Use mobility skills to juke or bait into vines to stun the Tyrant briefly.


Thorn Volley: Fires dozens of poison thorns in a radial burst.


Counter: Stand at medium range to avoid overlapping hits.


Phase 2 – The Maw Opens (75% HP)

The Tyrant retreats and summons Verdant Offshoots—mini-boss vines that tether to it for healing.


Focus fire on the tethers first; if three remain active for 10 seconds, the Tyrant fully regenerates 15% HP.


Terrain is now flooded with toxic brambles that cause stacking poison damage.


Bring Flask of Binding Purity (removes poison and grants ailment immunity briefly).


Use area-clearing skills like Fireball or Lightning Arc to kill offshoots quickly.


Phase 3 – Wrath of the Wild (30% HP)

The Tyrant enrages, doubling attack speed and gaining Maw Swallow—a 2-second animation where it devours players in melee range for near-instant death.


Stay at range or kite around rock pillars. Summons and totems can distract the boss.


The arena shifts with periodic spore storms—green clouds that reduce visibility and suppress regeneration.


Build Considerations

Recommended Defenses

75% Poison Resistance (with overcap for exposure effects).


Chaos Damage Reduction (via Pantheon and gear mods).


High Evasion or Block to avoid Root Slam or Thorn Volley.


Optimal Builds

Cold DoT Occultist (Vortex + Creeping Frost): Great for controlling adds and sustaining through poison.


Summon Carrion Golem Necromancer: Excellent at drawing aggro, safe against Maw Swallow, and effective during the add phase.


Ballista Totem Deadeye (Lightning Arrow): High uptime with safe, ranged damage during Phase 3.


Avoid melee-heavy builds unless you have high burst and know how to disengage quickly—Maw Swallow punishes close-range tunnel vision.


Loot and Rewards

Defeating the Verdant Tyrant rewards:


Thorn-Linked Vestige (unique chest with spore-activated defenses and thorns).


Maw-Etched Fang (new dagger with increased poison duration and chaos penetration).


Wild Hunt Remnants (crafting currency used to add “predator” modifiers to gear).


Alpha’s Heart (rare boss-exclusive jewel: +25% damage while affected by poison, but reduces flask duration).


Each clear also drops Verdant Spores, which can be traded for league-unique cosmetics and legacy Hunt recipes.


Final Tips and Strategy Recap

Pre-buff: Load up on poison immunity and chaos mitigation.


Movement: Always be repositioning. Static players die quickly here.


Add Management: Phase 2 is a DPS check—kill the offshoots fast.


Endurance: Phase 3 is chaos—keep distance, use flasks wisely, and don’t get greedy.


Conclusion

The Maw of the Verdant Tyrant is one of the most thrilling and punishing boss encounters in Path of Exile 2: Dawn of the Hunt. It rewards mastery over jungle-themed hazards, prioritizes smart positioning, and offers some of the best chaos-based loot in the game. Whether you're farming for powerful new uniques or looking to test your mettle, this apex predator fight should not be missed.


Ready your flasks, sharpen your steel, and buy POE 2 Currency enter the Maw—nature does not show mercy.

Wednesday, June 11, 2025

MMOexp Dune: Awakening – The Stormreaver's Path


Dune: Awakening plunges players into the brutal world of Arrakis, where survival hinges on mastering both environment and combat. Among the many powerful abilities at your disposal, the Sandstorm Reaper’s Wrath stands out as a game-changing skill that blends environmental destruction with lethal precision. This guide will dive deep into understanding, mastering, and Dune Awakening Solari maximizing the potential of this devastating sandstorm-based attack.


Understanding Sandstorm Reaper’s Wrath

The Sandstorm Reaper’s Wrath is a high-tier skill that summons a furious sandstorm around your character, dealing continuous area-of-effect (AoE) damage to nearby enemies while applying debuffs that weaken their defenses and reduce their accuracy. Unlike conventional attacks, this skill capitalizes on the volatile nature of the Arrakis environment, turning the harsh desert elements against your foes.


When to Use Sandstorm Reaper’s Wrath

Timing and positioning are key when wielding the Reaper’s Wrath. This skill excels in:


Crowd Control: Use it to disperse groups of weaker enemies, quickly softening them up or outright killing clusters before they overwhelm you.


Boss Fights: While its damage-over-time effect is slower than a direct strike, the debuffs it applies make bosses more vulnerable to your team’s focused attacks.


Defensive Maneuvers: If you find yourself surrounded or retreating, activating this skill can create a protective zone that discourages enemies from advancing.


How to Unlock and Upgrade Sandstorm Reaper’s Wrath

To access this skill, you’ll need to progress through the Desert Ascendancy skill tree, investing points in environmental manipulation and elemental mastery. Early investment in sandstorm synergy skills will boost the duration and damage of the Reaper’s Wrath.


Upgrades focus on:


Damage Increase: Boosts AoE damage output.


Debuff Strength: Intensifies enemy accuracy and defense reduction.


Duration Extension: Keeps the sandstorm active longer.


Cooldown Reduction: Allows more frequent use in combat.


Key Strategies for Mastery

1. Positioning is Everything

Since Sandstorm Reaper’s Wrath affects a radius around you, standing too close to your enemies can sometimes put you at risk, especially if they have strong melee attacks. Position yourself strategically—ideally on the edge of enemy groups—to maximize damage while minimizing incoming harm.


2. Synergize with Team Abilities

Coordinate with your team to stack debuffs. While your sandstorm weakens enemies, allies can follow up with high-damage skills or crowd-control abilities to capitalize on reduced defenses. Communication during raids or PvP scenarios can turn Sandstorm Reaper’s Wrath into a pivotal team asset.


3. Combine with Mobility Skills

Sandstorms can restrict your movement slightly. Pair this skill with abilities that enhance mobility or defensive buffs to maintain control over the battlefield without becoming an easy target.


4. Resource Management

Activating Sandstorm Reaper’s Wrath consumes significant stamina or energy resources. Manage your resource pool carefully to avoid being caught defenseless once the sandstorm fades. Use potions or skill cooldowns to regenerate quickly.


Optimal Builds Featuring Sandstorm Reaper’s Wrath

To get the most from this skill, consider integrating it into builds that focus on:


Elemental Mastery: Boosts all sand and wind-related effects, amplifying damage and debuff potency.


Survivability: Since you’ll be in the thick of combat, invest in defensive talents that increase resistance to physical and elemental damage.


Cooldown Efficiency: Lowering cooldowns allows more frequent use, increasing your presence on the battlefield.


Best Gear to Complement the Skill

Equipment that enhances environmental damage or reduces cooldowns pairs well with Sandstorm Reaper’s Wrath. Look for:


Sandstorm Amulets: These increase sandstorm duration and damage.


Desert Raider Armor: Provides bonus resistance while using sand-based abilities.


Windblade Weaponry: Amplifies elemental attacks tied to wind or sand.


Common Mistakes to Avoid

Overusing Without Backup: Sandstorm Reaper’s Wrath is powerful but can leave you vulnerable if used without team support or backup.


Ignoring Positioning: Standing in the wrong spot can lead to getting overwhelmed, especially against ranged enemies.


Neglecting Cooldowns: Without proper cooldown management, you might find yourself unable to use this skill when most needed.


PvP Applications

In player-versus-player combat, Sandstorm Reaper’s Wrath can disrupt enemy formations and break through defensive lines. Use it to zone opponents, control choke points, and create openings for your team. Remember that skilled players will try to evade or interrupt the skill, so unpredictable timing and mobility are your best friends.


Conclusion

Mastering Sandstorm Reaper’s Wrath transforms you into a formidable force on Arrakis. By understanding its mechanics, optimizing your build, and buy Dune Awakening Solari practicing strategic use, you can dominate both PvE and PvP encounters. The desert’s fury is in your hands—unleash it wisely and watch your enemies fall beneath the wrath of the sandstorm.

Tuesday, June 10, 2025

MMOexp Lineage 2M: Death from the Shadows – Antharas Awakened


Lineage 2M, NCSoft’s expansive mobile MMORPG, offers players a rich world full of sprawling dungeons, massive PvP conflicts, and Lineage 2M Diamonds terrifying world bosses. One of the most legendary foes in the game is Antharas, the Earth Dragon. In "Shadowstrike of the Antharas Awakening," players must prepare to face this titanic creature while mastering one of the game’s most lethal rogue-style abilities — Shadowstrike. This guide walks you through building for Shadowstrike and defeating Antharas in his awakened form.


Understanding the Shadowstrike Skill

Shadowstrike is a high-damage assassination ability used primarily by dagger-wielding classes such as Treasure Hunter or Abyss Walker. It’s designed for quick burst damage and mobility, ideal for both PvE boss fights and PvP ambushes.


Skill Traits:

Type: Active Melee Skill


Effect: Deals massive critical damage from stealth or behind the target


Bonus: Increased crit rate and chance to ignore defense


Cooldown: Moderate (requires precise timing)


Shadowstrike excels when combined with speed boosts, evasion, and stealth mechanics, allowing you to slip past guards or raid bosses’ AoEs for pinpoint lethal strikes.


Building the Shadowstrike Assassin

To maximize Shadowstrike’s potential, you need to optimize your character for speed, precision, and critical output.


Class Path

Start: Rogue


Advanced: Treasure Hunter / Abyss Walker


Specialization: Choose abilities that boost crit rate, evasion, and stealth duration.


Key Stats to Prioritize:

DEX (Dexterity): Increases accuracy and evasion


STR (Strength): Boosts melee damage and critical power


AGI (Agility): Reduces cooldowns and increases attack speed


Recommended Gear:

Weapon: Dual Daggers or Enhanced Assassin’s Blade


Armor: Light armor sets with evasion, speed, and crit bonuses (e.g., Phantom Set)


Accessories: Crit rings, evasion earrings, and cooldown reduction pendants


Enchantments: Focus on crit rate, movement speed, and backstab damage


Preparing for the Antharas Awakening Raid

Antharas, the Earth Dragon, is one of the mightiest world bosses in Lineage 2M. He awakens periodically and requires a full alliance raid or a highly-coordinated party to bring down. His mechanics challenge even veteran players.


Entry Requirements:

Character level 55+ recommended


Gear enhancement level +6 or higher


Access to the Dragon Valley Cave – Core Chamber


Time-limited event participation (Antharas Awakening events are typically scheduled weekly)


Antharas Awakening Boss Mechanics

Antharas uses a combination of AoE earth magic, tail swipes, summons, and rage phases. Knowing his patterns is critical for survival.


Phase 1: Earth Shockwaves

Antharas uses wide-range ground slams.


Spread out to minimize damage stacking.


Melee DPS should flank the rear and sides.


Phase 2: Stone Summons

He summons golems to protect him.


DPS should quickly clear adds to avoid overwhelming support roles.


Shadowstrike users can burst down casters or healers among the mobs.


Phase 3: Rage Awakening

At 30% HP, Antharas becomes enraged.


Increased damage and faster attack patterns.


He uses Roar of Destruction, which can one-shot undergeared players.


Shadowstrike Strategy vs. Antharas

Using Shadowstrike effectively during the Antharas fight requires both timing and stealth mobility.


Before Combat:

Use stealth abilities to close the gap safely.


Coordinate with your tank to avoid aggroing Antharas prematurely.


Activate buffs and cooldown reduction potions.


During Combat:

Circle around to Antharas’ back and wait for a moment when he’s not performing AoEs.


Use Shadowstrike when your crit chance is boosted (via buffs or class passives).


After attacking, immediately disengage to avoid retaliation — use skills like Evasion Roll or Shadow Retreat.


Mob Control:

During the Stone Summons phase, switch targets and use Shadowstrike to snipe high-priority mobs (casters or healers).


Shadowstrike’s burst makes it ideal for deleting low-HP mobs instantly.


Team Coordination Tips

Assign Shadowstrike users to flank Antharas and handle rear-side DPS responsibilities.


Tanks must maintain threat while leaving the back clear for assassins to operate.


Healers should prioritize movement-based healing to support mobile DPS like Shadowstrikers.


Voice or in-game chat is essential to coordinate AoE avoidance and burst damage phases.


Loot and Rewards

Defeating Antharas offers high-end loot including:


Earth Dragon Jewelry (rare accessories)


Dragon Scale Fragments (used for crafting)


Unique Dagger Blueprints


Antharas Rune Crystals (enhance Earth-elemental resistances and skills)


Shadowstrike assassins especially benefit from the Antharas Cloak, which boosts critical damage from behind and improves stealth duration.


Final Thoughts

In Lineage 2M: Shadowstrike of the Antharas Awakening, mastering both a deadly assassin build and one of the game’s most dangerous bosses offers a uniquely satisfying experience. Shadowstrike brings high-risk, high-reward gameplay, and when paired with strategic movement and precision, it can turn the tide of the battle.


Antharas may be a colossal threat, but with the right build, smart tactics, and a well-prepared team, even the mightiest dragon can fall to the blade of a silent killer.


So sharpen your daggers, step from the shadows, and buy Lineage 2M Diamonds let the Earth Dragon feel the sting of your Shadowstrike.

Monday, June 9, 2025

RSOrder RuneScape: Dominate Nex, the Ancient Summoner


In the world of RuneScape, few bosses inspire as much awe and challenge as Nex, the Ancient Summoner. Introduced in the God Wars Dungeon, Nex stands as one of the most demanding endgame PvE encounters, requiring skill, preparation, and RuneScape gold teamwork. Whether you are an aspiring soloist or a group raider, mastering Nex offers some of the best rewards and one of the most thrilling experiences in RuneScape.


This guide will walk you through everything you need to conquer Nex — from understanding her mechanics and phases to choosing the best gear, tactics, and strategies for success.


Understanding Nex: Lore and Encounter Overview

Nex is a powerful Zarosian general who commands the forces of the Zaros faction in the God Wars Dungeon. Players face Nex in a multi-phase fight inside her chamber, each phase requiring quick reflexes and strategic adaptation.


The fight involves four distinct phases, each with its own abilities and minions. Your ability to recognize and counter her moves will decide your success or failure.


Preparing for the Fight: Gear and Inventory Setup

To stand a chance against Nex’s deadly arsenal, you must enter the fight with optimal gear and supplies.


Recommended Gear

Weapon: A strong melee weapon such as the Abyssal Bludgeon or Noxious Scythe for high damage output.


Armor: High defense sets like Torva (melee) or Seasinger (magic) depending on your combat style.


Cape: Fire cape, Infernal cape, or Max cape with offensive perks.


Amulet: Amulet of Torture (melee) or Amulet of Fury.


Ring: Ring of Vigour or Berserker ring (imbued if possible).


Boots: Dragon boots or Primordial boots.


Inventory

Super combat potions or equivalent stat-boosting flasks.


Prayer renewal potions or Saradomin brews for healing.


Food like Sharks or Rocktails for sustain.


Antifire potions and stamina potions.


Weapon poison or bleed weapons to boost damage over time.


The Four Phases of Nex: Mechanics Breakdown

Phase 1: Smoke Phase

Nex summons smoke clouds that explode if you step inside them, dealing heavy damage.


Use ranged or magic attacks to hit Nex while avoiding the smoke.


She casts Smoke Tendrils — avoid the pools that damage over time.


Strategy: Stay mobile, kite her around the arena, and use abilities that allow safe damage.


Phase 2: Shadow Phase

Nex summons shadow minions that drain your stats.


She uses Shadow Tendrils — they latch onto players, requiring quick removal.


Prioritize killing minions quickly and stay aware of your stat drains.


Use Antipoison and stat-boosting prayers as necessary.


Phase 3: Blood Phase

Nex heals herself by draining blood from the arena.


She attacks with Blood Tendrils, which you must sever quickly or suffer damage.


Avoid pools of blood that can immobilize you.


Team coordination is crucial here to cut tendrils and avoid AoE damage.


Phase 4: Ice Phase

Nex freezes players in place with Ice Tendrils.


Players must quickly destroy tendrils or free frozen teammates.


Nex becomes more aggressive and uses freezing attacks.


Stay alert, use freedom or break free abilities, and focus on tendril destruction.


Combat Tips and Strategy

Prayer and Abilities

Use Protect from Melee during Nex’s melee attacks and switch to Protect from Magic or Protect from Ranged depending on the phase.


Utilize offensive prayers like Piety (melee) or Augury (magic) to increase damage.


Abilities like Debilitate reduce Nex’s damage, improving survivability.


Use Freedom or Anticipation to break free from tendrils.


Positioning

Positioning is vital to avoid smoke, shadow, blood, and ice pools.


Use safe spots to maximize damage while minimizing incoming attacks.


Always be ready to move quickly to sever tendrils or avoid AoEs.


Team Coordination

When fighting in groups, assign roles such as tendril destroyers, crowd control, and DPS.


Communicate about tendril status and health to optimize healing and focus.


Keep track of Nex’s health and prepare for phase transitions.


Rewards and Progression

Defeating Nex yields some of the most coveted loot in RuneScape, including:


Zaryte bow


Nex set pieces


Torva, Pernix, and Virtus armor parts


God Wars Dungeon unique drops


These rewards can significantly boost your combat power and allow you to tackle even tougher content.


Conclusion

Mastering Nex, the Ancient Summoner, is a milestone achievement in RuneScape. By understanding her phases, preparing the right gear, and executing careful strategies, you can overcome this formidable boss and claim its legendary rewards. Whether you choose to fight solo or with a team, Nex offers a challenging and rewarding test of your PvE skills.


Prepare well, stay focused, and buy OSRS gold face the wrath of Nex with confidence!

Saturday, June 7, 2025

ELD.gg Diablo 4: Synchronizing Loot Management and Economic Stability


Diablo 4 has captured the attention of gamers worldwide with its dark, immersive universe and Diablo IV gold challenging endgame content. Yet one aspect of the game continues to spark heated debate among its dedicated community: the absence of a loot filter. In numerous endgame battles and epic boss encounters, players are inundated with a barrage of dropped items, making inventory management an often overwhelming task. Since the game’s launch, fans have repeatedly called for a loot filter to help sort through this abundance of loot, and a recent comment from a Diablo 4 developer has once again brought the topic into the spotlight.


The Growing Call for a Loot Filter

The issue is simple: in the heat of battle, when massive amounts of loot are dropped, players can struggle to quickly identify which items are worth keeping and which are not. For many, the idea of a loot filter—a tool that allows them to customize which items are highlighted or automatically sorted—is a welcome quality-of-life improvement. This feature would help players focus on high-quality gear without getting bogged down by less useful items, streamlining their gameplay experience and saving precious time during high-stakes events.


For dedicated endgame players, every moment counts. The inability to efficiently manage loot means that valuable time is lost, and potentially game-changing items can be overlooked in the chaos. The community’s demands for this feature are not just about convenience—they reflect a deep desire to enhance performance and maintain competitive edge in an environment where precision and speed are crucial.


Blizzard’s Evolving Relationship with Player Feedback

Blizzard has a well-established history of engaging with its player base, often making significant improvements to Diablo 4 through seasonal updates and quality-of-life tweaks. Each new season brings with it a host of balancing changes and feature enhancements, many of which were directly inspired by community feedback. Despite this ongoing dialogue, the persistent requests for a loot filter seem to have met with a cautious response from the developers.


A recent comment from a Diablo 4 developer highlighted the complexity behind the decision to integrate a loot filter. While the idea is popular among fans, Blizzard is weighing the benefits of easier loot management against potential unintended consequences—specifically, its impact on the game’s internal economy. This response underscores Blizzard’s commitment to preserving the intricate balance of gameplay, even when that means resisting popular demands.


The Economic Implications of Loot Filtering

At first glance, a loot filter appears to be a straightforward enhancement. However, Blizzard’s hesitance reveals a deeper concern about how such a feature might alter the game's delicate economic ecosystem. In Diablo 4, every item—even those that seem of lower quality—plays a role in the broader market. These items provide a source of income through selling or salvaging, contributing to a vibrant in-game economy that underpins the progression of players across the board.


A fully functional loot filter could inadvertently cause players to bypass or discard lower-tier items, leading to a decrease in overall item circulation. This reduction could, in turn, disturb the balance of supply and demand within the game, potentially diminishing opportunities for trade and impacting players who rely on the economy to upgrade their gear. Blizzard is acutely aware of these ramifications, which is why the idea of a loot filter is not as straightforward as it might seem.


Conclusion: The Future of Loot Management in Diablo 4

The conversation surrounding the potential addition of a loot filter in Diablo 4 is a testament to both the passion of its community and the complexity of modern game design. While players continue to call for a tool that would simplify inventory management and enhance endgame performance, Blizzard’s measured approach highlights the potential risks such a feature could pose to the in-game economy.


Blizzard’s ongoing dialogue with its community has resulted in numerous quality-of-life improvements over time, and it stands to reason that if the demand for a loot filter remains strong enough, innovative solutions may eventually be implemented. Whether through a fully realized loot filter or a customizable system that mitigates economic concerns, one thing is clear: the evolution of Diablo 4 will continue to be shaped by a careful balance between player needs and the core mechanics that make the game so engaging.


In the end, the future of loot management in Diablo 4 will depend on finding that perfect equilibrium—one where convenience does not come at the cost of complexity, and Diablo IV gold for sale where every player can enjoy a streamlined experience without undermining the very systems that define the game. As the developers continue to listen and adapt, the hope is that Diablo 4 will remain a shining example of how thoughtful design and community collaboration can drive meaningful innovation in the gaming world.

Friday, June 6, 2025

ELD.gg Path of Exile 2: Witch Warfare: Conquer with Control


The witch is a typical "summoning mage" who is good at controlling the battlefield through a large army of servants and long-range spells, exchanging the minimum risk for the maximum benefit. The core of its gameplay lies in resource scheduling and POE2 Currency battlefield segmentation, which is suitable for players who like strategic layout and avoid direct conflict. 

Continuous servants (such as skeleton warriors and monsters):


Function: front row resistance, attracting hatred, and creating an output environment.


Skills: Prioritize summoning and deploying on the enemy's path, using its high blood volume to delay time and strive for opportunities for spell chanting.


Explosive servants (such as self-destructing spiders and elemental puppets):


Function: range damage, interrupt enemy skills, and clear miscellaneous soldiers.


Tips: Predict the enemy gathering point and release, or summon based on the weak attributes of the boss (such as using ice puppets to restrain fire enemies).


Common misunderstandings and advanced skills


Misunderstanding 1: Blindly stack the number of minions.

→ Correction: More than 6 minions will trigger "soul overload" (they will suffer additional damage), so the number needs to be controlled.


Misconception 2: Ignore the main body's position.


→ Correction: Although the witch relies on the minions, she still needs to maintain a "triangle position" (at an angle with the minions and the enemy).


Advanced skills:


Hate transfer: Using "Provocation Potion" on the minions can force the enemy to attack it for 3 seconds.


Environmental utilization: Lead the enemy to terrain such as "poison swamp" and "magma", and the minions will block the road to achieve continuous consumption.


Summary

The essence of the witch is a battlefield commander, who needs to coordinate the three elements of minions, spells, and POE2 Currency for sale environment. Master the rhythm of "retreat to advance", and you can counter through strategy even if your equipment is inferior. Remember: your survival is the guarantee of victory, let the minions become your shield and sword!

Thursday, June 5, 2025

Fury of the Depths: Conquering Admiral Blackpowder in New World


Deep within the ruined fortress of The Depths, one of Aeternum’s most fearsome Expeditions, lurks Admiral Blackpowder—a brutal pirate commander whose corrupted soul drives a relentless assault on all who enter his domain. As the second and final boss of the Expedition, Blackpowder tests your group’s coordination, timing, and New World coins resilience with a mix of cannon fire, melee flurries, and explosive chaos.


In this guide, we’ll walk through:


Preparing for the fight


Blackpowder’s mechanics and abilities


Group roles and positioning


Phase strategies


Rewards and loot


Whether you’re a first-time explorer or a seasoned dungeon crawler, mastering this encounter is key to advancing through New World’s PvE content.


Getting to Admiral Blackpowder

Before facing Blackpowder, your group must first defeat Commander Thorpe, the corrupted elite captain and the first major boss in The Depths. Once Thorpe falls, your group will fight through several pirate-themed encounters and cannon-heavy sections. Prepare to clear waves of Corrupted enemies and disable explosive devices before reaching the final arena—a wide open room with shipwrecks, explosive barrels, and a cannon-laden platform.


Blackpowder awaits at the far end, overseeing his cursed fleet and eager to drag you under.


Fight Overview

Admiral Blackpowder is a multi-phase boss with a mixture of ranged cannon attacks, AoE explosives, summoned adds, and heavy melee strikes. The fight consists of two key phases:


Phase One – Ranged cannon attacks, targeted AoE, and minor adds.


Phase Two – Increased aggression, multiple adds, bomb summons, and AoE death zones.


Blackpowder’s greatest strengths are area denial and chaotic pressure—making this fight a DPS and awareness check.


Recommended Party Composition

A balanced group is crucial. Here's the ideal party setup:


1 Tank (Sword and Shield or Greatsword)


1 Healer (Life Staff)


3 DPS (Mix of ranged and melee preferred; Bow/Musket and Great Axe/Hatchet are common picks)


Key perks to bring:


Corrupted Ward/Protection (Reduces damage from Corrupted enemies)


Refreshing (Reduces cooldowns—critical for healers and tanks)


Keen Awareness (Crit chance boost—great for ranged DPS)


Phase One Mechanics

Cannon Salvos

Blackpowder frequently uses the Cannon Fire ability, launching AoE shells into random areas. These hit hard and leave lingering damage zones.


Strategy: Stay mobile and watch the ground for red telegraphs. Use rolls and dodges to avoid the shells. Ranged players should kite along the backline.


Powder Kegs

Explosive barrels appear randomly on the field. If not avoided, they can detonate and deal devastating AoE damage.


Strategy: Don’t engage near barrels. Tanks should pull Blackpowder away from these to avoid accidental chain reactions.


Minor Add Summons

In Phase One, Blackpowder occasionally summons corrupted pirates—low-health enemies meant to distract.


Strategy: DPS should quickly burn adds down. A melee DPS with cleave (Great Axe or Spear) is ideal for controlling them.


Group Roles in Phase One

Tank:

Hold aggro and position Blackpowder away from the barrels.


Block heavy melee combos—especially Cleave Slam, which deals burst frontal damage.


Keep the boss in the center or slightly off to one side for healer LOS.


Healer:

Prioritize area healing (Sacred Ground + Beacon).


Keep a cleanse ready for any DoT effects (Splash of Light).


Don’t get tunnel-visioned—avoid cannon AoEs!


DPS:

Ranged players should strafe to avoid cannon fire while maintaining damage uptime.


Melee players must time dodges carefully and be ready to back off during AoE overlaps.


Focus adds the moment they spawn.


Phase Two Mechanics

At 50% HP, Blackpowder enters Phase Two, shouting as corrupted power surges around him. He becomes more aggressive and adds new abilities.


Bombardment Barrage

The arena is targeted by a rapid series of cannon explosions. This is Blackpowder’s signature AoE phase.


Strategy: Spread out and keep moving. This phase can easily wipe clustered groups. Use movement abilities to stay ahead of AoEs.


Bomb Summons

Floating bombs appear and slowly drift toward players. They explode in wide AoE bursts if not avoided or destroyed.


Strategy: Ranged DPS should prioritize bomb adds. Use single-target abilities like Penetrating Shot or Power Shot to destroy them from afar.


Elite Add Spawns

Two elite pirate lieutenants spawn at 30% HP. They can stun, bleed, or stagger players.


Strategy: Tank should pick up one elite, while melee DPS kite the other. Focus fire them down before reengaging Blackpowder.


Advanced Tips & Tricks

1. Stagger Lock with Hatchet

If your team includes a Hatchet user, they can help stagger-lock Blackpowder with Feral Rush and Raging Torrent combos. Just be careful not to overextend during AoE phases.


2. Cleave Bombs with Spear Sweeps

The Spear’s sweep attack can push bombs away from allies or combo-kill several minor adds.


3. Kite Adds with Musket Traps

Musket players can lay Traps at key spawn points to slow elite adds or block bomb progress toward the group.


Rewards & Loot

Defeating Admiral Blackpowder rewards players with high-quality Expedition gear, including:


Named Drops:

Blackpowder’s Blunderbuss – A powerful ranged weapon with perks like Keen and Leeching Shrapnel Blast.


Corsair’s Jacket – Light armor with Corrupted Ward and Constitution.


Boots of the Depths – Medium boots offering Stamina Recovery and Refreshing.


Other Rewards:

Tuning Orbs (if applicable)


High-tier crafting mats (Runestones, Gems)


Expedition Codex pages (lore collectors take note!)


After the Battle

Once Blackpowder is defeated, The Depths Expedition is complete. Be sure to:


Gather all chests—several hidden containers can be looted in the final room.


Complete any Expedition-specific quests—such as faction missions or named boss kills.


Repair and regear—this fight drains resources, especially potions and repair parts.


Conclusion

Admiral Blackpowder is a dynamic, punishing boss that rewards smart positioning, awareness, and coordination. His use of cannon salvos, explosives, and chaos-heavy mechanics make him one of the more unique bosses in New World.


Mastering this fight means:


Communicating with your team


Avoiding AoE patterns


Managing adds and bombs


Executing cooldowns precisely


Once defeated, Blackpowder not only drops top-tier loot but also clears a major milestone in your PvE journey.


So grab your sword, ready your spells, and buy New World coins sail into the storm—you’re ready to face the Fury of the Depths. 

Wednesday, June 4, 2025

Embers of Hatred: Hellforged Havoc with the Infernal Reaver in Diablo 4 Season 8


Diablo 4 Season 8, titled Embers of Hatred, introduces a wave of infernal chaos across Sanctuary. With the fires of the Burning Hells rekindled, new threats, rewards, and Diablo IV gold legendary equipment rise to test Nephalem from every corner. Among the most coveted additions this season is the Infernal Reaver, a two-handed weapon forged from the hatred of fallen hellspawn. This guide dives into everything you need to know about unlocking, optimizing, and dominating Season 8 using the Infernal Reaver.


What is the Infernal Reaver?


The Infernal Reaver is a Season 8-exclusive legendary two-handed sword that excels in area damage, critical strikes, and synergy with fire-imbued and DoT (damage-over-time) skills. It is particularly suited for Barbarian and Rogue builds, though creative players will find room to incorporate it across classes.


Weapon Affixes and Perks:


+X% Fire Damage

+Y% Critical Strike Damage to Burning Enemies

Chance on hit to create a Hellflame eruption (AoE fire blast)

+Z% Attack Speed after killing a burning enemy (for 4 seconds)


Unique Effect: "Enemies slain by your fire skills erupt after 2 seconds, spreading burn to nearby targets"


How to Obtain the Infernal Reaver


There are several ways to obtain the Infernal Reaver in Season 8:


World Tier 3 and 4 Drops: The Reaver starts appearing as a world drop in higher tiers, especially from elite monsters in the Burning Scar zones introduced in Embers of Hatred.


Seasonal Event: Ashen Crucible: Completing waves in this brutal arena-style event gives you a high chance to drop Season 8 legendaries.


Hellforged Cache: A reward from the weekly capstone dungeon, "The Forge of Hate," which has a significantly increased drop rate for the Infernal Reaver.


Crafting: After obtaining the blueprint from the Season Journey Chapter 5, players can reroll the Infernal Reaver at the Occultist, although it requires rare materials like Scorched Embers and Demonsteel.


Best Classes and Builds for the Infernal Reaver


While the Infernal Reaver can technically be used by all classes, it shines brightest in builds that revolve around fire damage and rapid area clearing.


Barbarian: Hellflame Berserker Build


Core Skills:


Whirlwind (with Burning Rage modifier)


Lunging Strike


Wrath of the Berserker


Ground Stomp


Synergy:

The Hellflame eruption effect procs frequently with Whirlwind, clearing large groups of enemies while stacking burn effects. Wrath of the Berserker keeps your DPS high while Ground Stomp gives crucial crowd control. Equip Flameblood’s Mantle to enhance fire DoTs.


Rogue: Scorched Blades Assassin


Core Skills:


Twisting Blades


Caltrops (with Burning Trap passive)


Shadow Step


Death Trap


Synergy:

Use Caltrops to apply burn, followed by Twisting Blades to trigger massive Hellflame explosions. Death Trap and Shadow Step allow quick repositioning and resets. With the Reaver, your blade skills can cause chained eruptions, turning elite packs into cinders.


Sorcerer: Emberstorm Arcanist


Core Skills:


Fireball


Hydra


Teleport


Firewall


Synergy:

Fireball and Firewall maintain consistent burn application. The Infernal Reaver, while not typical for Sorcerers, pairs well with unique enchantments that convert melee crits into spell bonuses. Use this as a novelty or hybrid build.


Infernal Reaver Mods and Enchantments


Once obtained, it’s critical to optimize the Infernal Reaver with the right affixes:


Prioritize:


+Fire Damage


+Damage to Burning Enemies


+Attack Speed


+Crit Chance


Legendary Aspects to Imprint:


Aspect of Burning Rage: Adds burn damage to basic attacks


Aspect of Blazing Speed: Boosts movement speed while burning enemies are nearby


Aspect of Flame Rebirth: Chance to revive on death with full burn stacks on enemies


These aspects can turn the Infernal Reaver from a great weapon into a season-defining powerhouse.


Season 8 Activities to Maximize Reaver Utility


To get the most from the Infernal Reaver, focus on the following content loops:


The Ashen Crucible – Ideal for testing AoE potential and farming ember-based gear.


Burning Scar Hunts – Elite demons drop materials for Reaver upgrades.


Seasonal Contracts – Contracts often send players into infernal dungeons, ripe with opportunities for burn-chain kills.


PvP (Fields of Hatred) – The Reaver’s delayed eruption can zone enemies and control space exceptionally well.


Advanced Tips and Tricks


Reaver + DoT Builds: Pairing the Reaver with DoT-heavy abilities and gear can cause chain reactions that obliterate enemy waves.


Hellflame Eruption Timing: Mastering the 2-second delay on the burn explosion is critical; kite enemies into clumps for devastating results.


Crowd Control Synergy: Abilities that slow, root, or trap enemies (like Rogue’s Caltrops or Sorcerer’s Frost Nova) ensure they stay in the blast radius.


Mob Density Scaling: The Reaver scales excellently in high-density content, so prioritize dungeon affixes and world events that spawn hordes.


Closing Thoughts


The Infernal Reaver is the centerpiece of Diablo 4’s Embers of Hatred season, embodying the chaos and cheap Diablo IV gold destruction of hellfire unleashed. With proper optimization and build synergy, this weapon turns any hero into a walking inferno. Whether you're clearing dungeons, battling in PvP, or climbing the seasonal ladder, the Reaver ensures you do it in blazing style. Embrace the havoc, and let hatred burn your path to glory.

Tuesday, June 3, 2025

Mastering Tempest Strike: A Primalist's Guide to Elemental Burst and Shapeshift Synergy in Last Epoch


Last Epoch’s ever-evolving class system has made the Primalist one of the most dynamic and Last Epoch Gold versatile characters in the game. With the arrival of new skill synergies and updates to elemental scaling, Tempest Strike has risen in popularity, offering high elemental burst damage combined with impressive shapeshift interactions. This guide explores how to fully optimize Tempest Strike, build around elemental burst combos, and effectively use shapeshifting forms like Werebear and Spriggan to dominate both solo content and endgame monoliths.


What Is Tempest Strike?


Tempest Strike is a Primalist skill that delivers a melee attack with a chance to unleash additional elemental effects:


Lightning Strike: Deals lightning damage in an area.


Ice Thorns: Fires a cone of ice projectiles.


Earth Spikes: Triggers earth damage in a line.


This makes Tempest Strike a hybrid melee-caster tool with strong elemental theming. While initially RNG-dependent, its skill tree allows for scaling the proc chances and increasing the damage of each element.


Key Strengths


High Elemental Burst: Each swing can potentially unleash multiple elemental effects.


Versatile Scaling: Can scale with elemental damage, melee, spell, or elemental penetration.


Shapeshift Synergy: Works well with Spriggan and Werebear forms.


AoE Coverage: Excellent crowd control in monolith and arena farming.


Skill Tree Breakdown


Recommended Tempest Strike Specialization


Focus on enhancing elemental damage, increasing proc chances, and utility.


Core Nodes:


Storm’s Aid: Increases the chance for all three elemental procs.


Nature’s Wrath: Converts Tempest Strike to a Spell, allowing synergy with spell damage and mana efficiency.


Elemental Barrage: Boosts elemental damage per effect triggered.


Force of Nature: Adds increased chance to trigger all three procs on each hit.


Optional Utility Nodes:


Stormcaller’s Precision: Improves critical strike chance for elemental procs.


Fury of the Wild: Adds chance to bleed or poison, depending on your scaling direction.


Synergy with Shapeshift Forms


The real power of Tempest Strike lies in combining it with Primalist’s Druid Mastery, particularly via Shapeshifting into Werebear or Spriggan.


Werebear Form


Why It Works: Tempest Strike can be cast through Werebear using the Swipe skill, particularly if you’ve specialized it to cast Tempest Strike via nodes like Rampaging Swipe.


Passive Synergies: Werebear’s nodes increase melee and elemental damage while offering mobility and tankiness.


Key Skill Synergy:


Rampage: Close distance rapidly.


Maul: Add crowd control or stun.


Spriggan Form


Why It Works: Spriggan Form supports a spell-heavy approach. Since Tempest Strike can be converted into a Spell (via Nature’s Wrath), this allows you to scale with spell damage, elemental penetration, and mana efficiency.


Key Skill Synergy:


Thorn Shield: Adds survivability and retaliatory damage.


Summon Vines: Boosts passive DoT and screen control.


Passive Tree Synergies


Primalist Tree


Tempest Bond: Increases elemental damage when under effects of Tempest Strike.


Wisdom of the Wild: Boosts mana regeneration and spell damage.


Druid Tree (Recommended Mastery)


Natural Attunement: Boosts elemental resistance and spell damage.


Ursine Strength: Adds flat melee damage (if not converted to spell).


Savage Form: Adds bonuses while in Werebear or Spriggan form.


Elder Branch: Adds global elemental and healing effectiveness.


Beastmaster (Alternate Mastery Option)


While less ideal than Druid for spell-focused Tempest Strike, Beastmaster offers superior companion synergy.


Savage Hunters: Boost companion damage.


Aspect of the Boar: Provides defenses while attacking.


Gearing and Stats Priority


Core Stats


Elemental Damage (Increased & Added)


Melee or Spell Damage (Depending on Tempest Strike build)


Elemental Penetration


Critical Strike Chance and Multiplier


Mana Regeneration (Spriggan)


Health and Endurance


Weapon Choices


One-Handed Staff or Sceptre for spell-focused builds


Two-Handed Mace or Axe for melee hybrid builds


Key Uniques


Stormcarved Testament: Increases proc chance and elemental penetration.


Shattered Chain of the Spriggan: Grants mana regen and synergy with Spriggan Form.


Tempest Maw: Boosts damage when all three elemental effects are active.


Idol Affixes


+% Tempest Strike Proc Chance


Increased Elemental Damage while Shapeshifted


Health Regen or Mana Efficiency depending on form


Recommended Skill Loadout


Druid + Tempest Strike Core Build


Tempest Strike (Main Damage)


Werebear Form OR Spriggan Form (Shapeshift Core)


Maul or Swipe (Mobility + AoE)


Thorn Shield (Defense)


Summon Vines or Fury Leap (Crowd Control / Movement)


Monolith and Arena Performance


Monolith


Clear Speed: Excellent. Procs from Tempest Strike clear mobs quickly.


Survivability: High in Werebear, moderate in Spriggan.


Bossing: Sustain elemental DoT and burst via procs. Use shapeshift to avoid boss mechanics.


Arena


Crowd Control: Excellent with elemental knockbacks and slows.


Scaling: Can scale well into higher tiers with good mana management and health regen.


Threats: Avoid enemies with elemental resistance or mana drain effects.


Tips for Mastery and Playstyle


Tempo Matters: Tempest Strike rewards a consistent attack rhythm. Use skills like Fury Leap or Rampage to maintain uptime.


Form Switching: Don’t hesitate to shift between Werebear and Spriggan based on fight dynamics.


Know Your Scaling: Choose spell or melee focus early and tailor gear accordingly.


Practice Rotation: Use Tempest Strike between movement skills and defensives for high uptime.


Manage Resources: Spriggan builds need mana regen; Werebear needs health leech and endurance.


Conclusion


Tempest Strike has evolved into a powerful skill with deep synergy potential, especially for players who enjoy complex builds involving elemental scaling and shapeshifting. Whether you prefer to tank in Werebear Form or blast away in Spriggan Form, mastering this skill means embracing flexibility, learning timing, and optimizing every node and piece of gear.


With the right build, Tempest Strike becomes more than just a melee swing—it becomes a devastating elemental storm.


So gear up, shape the storm, and buy Last Epoch gold let nature strike through you!

Monday, June 2, 2025

RSOrder The Open Sea Awaits: Leveling Up the Sailing Skill in OSRS


Sailing is one of the most anticipated new skills making its way to Old School RuneScape (OSRS). While Jagex continues to polish the finer details, early insights suggest that this skill will introduce vast oceans to explore, customizable ships, and RuneScape gold a whole new layer of gameplay for adventurers. Whether you're into exploration, combat, or simply want to discover hidden lands, Sailing is shaping up to be a thrilling addition.


How to Get Started with Sailing

Before you can take to the seas, you’ll likely need to unlock the skill through quests or tasks that introduce you to the basics of sailing. Once you’ve completed the required content, you’ll gain access to your own ship—a vessel you can build, modify, and upgrade as you progress. This ship will be your gateway to all things Sailing, serving as both transport and tool for exploration.


Core Sailing Mechanics

At the heart of Sailing is navigation and exploration. You’ll chart courses across open waters, visit new regions, and tackle unique challenges on the high seas. Sailing will involve managing multiple ship systems:


Ship health


Crew morale and supplies


Navigational hazards


Enemy encounters


The system is expected to feature a navigational interface where players can plot their voyages, some of which will take you into uncharted territory—introducing risk, rewards, and surprises.


Training the Sailing Skill

Leveling Sailing will involve a mix of activities, both passive and active. Possible training methods include:


Traveling to new locations


Completing time-based voyages


Participating in sea-based mini-games


Engaging in naval combat


Gathering sea-based resources


Training may feel more like an adventure than a grind, with some tasks running in the background while you multitask and others demanding focus and quick reactions.


Conclusion

The Sailing skill is poised to revolutionize gameplay in Old School RuneScape. With open-world navigation, player-versus-player sea combat, ship customization, and OSRS GP for sale treasure-laden quests, it brings a brand-new dimension to the game. While we await full release details, one thing is clear—Sailing will offer adventure, strategy, and exploration like never before. Get ready to take the helm and explore the unknown!

Friday, May 30, 2025

ELD.gg Elden Ring Whetblades: Master Weapon Affinities and Dominate the Lands Between


In Elden Ring, the path to becoming an unstoppable force is paved with careful preparation, knowledge of the lands, and Elden Ring Runes mastery over your arsenal of weapons. Among the many tools that allow you to customize and enhance your combat abilities are Whetblades—special Key Items that unlock the ability to change your weapon’s affinity. This not only adjusts how your weapons scale with your character’s stats but can also add secondary damage types like fire, magic, or holy damage, offering an entirely new layer of strategy and customization.


Whether you’re a seasoned Tarnished or just beginning your journey through The Lands Between, understanding Whetblades and collecting them all is crucial if you want to unlock the full potential of your weapons. In this guide, we’ll break down exactly what Whetblades are, why they matter, and where you can find each one. By the end, you’ll be well on your way to forging a weapon that suits your unique playstyle.


This Whetblade unlocks Holy (ideal for Faith builds focused on fighting undead and dealing radiant damage) and Lightning, which can be devastating for Dexterity and hybrid builds focusing on fast, high-damage attacks.


How to Use Whetblades Effectively

Once you have a Whetblade, using it is simple:


Rest at any Site of Grace.

Select Ashes of War from the menu.

Choose a weapon, then apply an Ash of War and select an Affinity (provided you have unlocked the corresponding Whetblade).

Keep in mind that different affinities change how your weapon scales with your stats and may add or alter damage types. For example:


Heavy Affinity boosts Strength scaling but reduces other stat scalings.

Keen Affinity favors Dexterity.

Magic and Flame Art Affinities add elemental damage while adjusting scaling toward Intelligence or Faith.

Experiment with combinations to find what works best for your build!


Final Thoughts: Unlock the True Power of Your Arsenal

Collecting all six Whetblades in Elden Ring is a game-changer for any Tarnished looking to fine-tune their combat style. Whether you prefer brute force, swift strikes, status effects, or elemental damage, Whetblades give you the freedom to customize your weapons to perfectly complement your character’s strengths.


By tracking down each Whetblade, you’ll unlock the full potential of your arsenal, ensuring that no enemy in The Lands Between can stand against your might. So don’t delay—venture into Limgrave, Liurnia, Caelid, and beyond to gather these essential tools of war.


With Whetblades in hand, and Elden Ring Runes for sale your weapons finely honed, you’ll be ready to face any challenge that Elden Ring throws your way.

Thursday, May 29, 2025

ELD.gg Path of Exile 2: Witch Warfare: Conquer with Control


The witch is a typical "summoning mage" who is good at controlling the battlefield through a large army of servants and long-range spells, exchanging the minimum risk for the maximum benefit. The core of its gameplay lies in resource scheduling and POE2 Currency battlefield segmentation, which is suitable for players who like strategic layout and avoid direct conflict. The following is a detailed strategy:


Passive combat core: summon management and positioning art


1. Summon type and division of labor

The witch's summons are divided into two categories, which need to be flexibly matched according to the battle situation:


Continuous servants (such as skeleton warriors and monsters):


Function: front row resistance, attracting hatred, and creating an output environment.


Skills: Prioritize summoning and deploying on the enemy's path, using its high blood volume to delay time and strive for opportunities for spell chanting.


Explosive servants (such as self-destructing spiders and elemental puppets):


Function: range damage, interrupt enemy skills, and clear miscellaneous soldiers.


Tips: Predict the enemy gathering point and release, or summon based on the weak attributes of the boss (such as using ice puppets to restrain fire enemies).


2. Servant formation control

Fan-shaped encirclement: Distribute the servants around yourself to prevent being wiped out by AOE skills.


Step-by-step advancement: First send a meat shield to attract firepower, then release high-damage servants to attack from behind.


Retreat command: Long press the summon key to order the servants to return to defense to avoid meaningless losses.

Strategies for dealing with different enemies


1. Highly mobile enemies (assassins, archers)

Countermeasures: Pre-bury "thorn traps" under your feet → Summon fast minions (such as wolves) to chase → Use instant immobilization spells (such as "Earthbind").


Taboo: Avoid long chanting spells, and prioritize saving your life.


2. Group enemies (beast tide, summoning BOSS)

Countermeasures: Summon AOE minions (such as fire demons) at the beginning → Release "Plague Spread" (continuously spread damage) → Keep the flash skill to deal with the breakout


3. BOSS battle


Phase 1 (70% HP or above): Minions resist damage, and the main body remotely stacks "Corrosion Mark" (damage-increasing debuff).


Phase 2 (30%-70%): When the BOSS is enraged, use "Gargoyle" (high-defense minions) to resist, and focus on interrupting its charging skills.


Slaying phase: Summon all burst minions + release "Soul Harvest" (extra damage to low-health enemies) to finish.


Teamwork positioning


Assisted control: Use "Dark Field" (reduce enemy attack speed) to cover teammates, and give priority to killing enemy healing units.


Resource exchange: Minions can block fatal skills for teammates (such as the BOSS's killing attack), but communication is required in advance to avoid misjudgment.


Burst coordination: Before teammates release their ultimate skills, use "Weak Curse" to weaken the enemy's resistance.


Summary

The essence of the witch is a battlefield commander, who needs to coordinate the three elements of minions, spells, and cheap POE 2 Currency environment. Master the rhythm of "retreat to advance", and you can counter through strategy even if your equipment is inferior. Remember: your survival is the guarantee of victory, let the minions become your shield and sword!

Wednesday, May 28, 2025

New World Greatsword Build Guide: Mastering Skyward Slash for PvP and PvE Domination

If you’re looking to unleash devastating damage and control the battlefield in New World, the Greatsword is one of the most powerful and stylish weapon choices available. At the heart of this weapon lies Skyward Slash, a brutal and New World coins versatile skill that can turn the tide of battle when used effectively. Whether you're fighting waves of corrupted enemies in PvE or clashing against players in PvP, this guide will help you build around Skyward Slash to maximize your impact.


Why Choose the Greatsword and Skyward Slash?

The Greatsword offers a high-risk, high-reward combat style with massive damage potential, wide arcs, and a unique stance system that allows for versatile play. Skyward Slash, one of its signature skills, provides both offensive and utility advantages:


Stamina Damage: Skyward Slash breaks enemy block, draining their stamina and creating an opening.


Weaken Debuff: Upgraded versions of this skill apply a powerful weaken effect, reducing enemy damage output.


Combo Potential: Chaining Skyward Slash into other Greatsword skills allows for devastating burst windows.


Skyward Slash makes the Greatsword a top-tier choice for bruisers and frontline warriors who want to disrupt enemies and apply pressure in every fight.


Skyward Slash Skill Breakdown

Skyward Slash is found in the Onslaught Tree, which focuses on aggression and heavy damage.


Base Skill Effects:

Perform an upward slash that deals 110% weapon damage.


Applies a 2s stagger and damages stamina on blocking targets.


Skill Upgrades:

Skyfall Sword – After Skyward Slash, you can press light attack to follow up with a downward strike that deals additional damage (140% weapon damage). This creates a powerful two-hit combo.


Sickening Slash – The second strike now applies a 20% Disease debuff for 10s, reducing healing on targets — perfect for punishing healers.


Critical Comeback – If either hit lands as a critical, you gain 20 stamina and 10% health over 5s. Great sustain tool in extended fights.


These upgrades make Skyward Slash a core ability that functions as an opener, combo extender, and sustain option all at once.


Optimal Weapon Pairing

While the Greatsword can dominate on its own, pairing it with the right secondary weapon can cover its weaknesses and expand your utility.


Best Pairings:

Hatchet – Provides Berserk for self-healing and CC immunity, ideal for solo players.


Sword and Shield – Adds block, taunt, and defense for tanky builds or PvP group play.


Void Gauntlet – Adds crowd control and debuffs; synergizes well with Skyward Slash’s weaken and disease effects.


Your choice depends on whether you want to lean into offense, survivability, or group utility.


Attributes and Stats

The Greatsword scales equally with Strength and Dexterity, but for a Skyward Slash-centric build, prioritize Strength for raw power.


Suggested Distribution:

300 Strength – Unlocks the 15% damage bonus on heavy attacks and grit on attacks.


150 Constitution – Provides health buffer and 10% max HP from potions.


This gives you the best balance of damage and survivability in most scenarios.


Perk and Gear Loadout

Key Perks:

Empowering Skyward Slash – Increases damage or applies bonus effects like Rend or Weaken on hit.


Refreshing Move – Reduce cooldowns on weapon hits for more frequent Skyward Slashes.


Enchanted – Boosts light and heavy attack damage, ideal for Greatsword users.


Freedom (Armor) – Reduces crowd control duration; essential in PvP.


Ideal Gear:

Heavy Armor for PvE (damage mitigation and staying power).


Medium Armor for PvP (balance between dodging and protection).


Crafting or farming named gear pieces with the right perks is key for min-maxing this build.


Ability Loadout and Rotation

Greatsword Skill Loadout:

Skyward Slash – Primary debuff and damage skill.


Relentless Rush – Mobility tool and secondary source of AoE damage.


Steadfast Strike – Sustains health and staggers enemies.


Combat Rotation Example (PvE):

Open with Skyward Slash + follow-up strike.


Use Relentless Rush to reposition and damage.


Hit with Steadfast Strike to stagger and heal.


Basic light/heavy attacks in between cooldowns.


Use Skyward Slash off cooldown to maintain pressure and debuffs on enemies.


PvP Tactics with Skyward Slash

Skyward Slash excels in PvP when used strategically:


Initiation:

Start with a charged heavy attack to gain grit, then combo into Skyward Slash to break enemy block and weaken them.


Follow up with Relentless Rush to stay on target or finish with Steadfast Strike.


Against Healers:

Skyward Slash’s Disease debuff shuts down their healing effectiveness.


Stack this with crowd control or a Void Gauntlet teammate for maximum impact.


Defensive Use:

When being pressured, use Skyward Slash defensively to stagger, regain stamina, and retreat or reposition.


Tip: Use the Onslaught stance to gain aggressive bonuses, then swap to Defiance stance if you need grit or tankiness.


Tips for Mastery

Use Animation Cancels: Learn to cancel recovery animations with dodges or stance changes to stay mobile.


Watch Cooldowns: Skyward Slash has a moderate cooldown—pair with Refreshing perks to keep it active often.


Target Weakness: Focus on supports or light armor enemies where your debuffs hit hardest.


Positioning Matters: The follow-up swing of Skyward Slash hits in a slightly different arc—adjust positioning to land both hits.


Conclusion: Why Skyward Slash Dominates

Whether you're charging headfirst into a corrupted breach or brawling at a war camp in PvP, Skyward Slash is a powerhouse skill that defines the Greatsword's identity. With high burst, utility debuffs, and combo potential, it rewards aggressive play and precision.


Pair it with the right gear, stance knowledge, and cheap New World coins a well-rounded build, and you’ll carve through enemies like a true champion of Aeternum.